
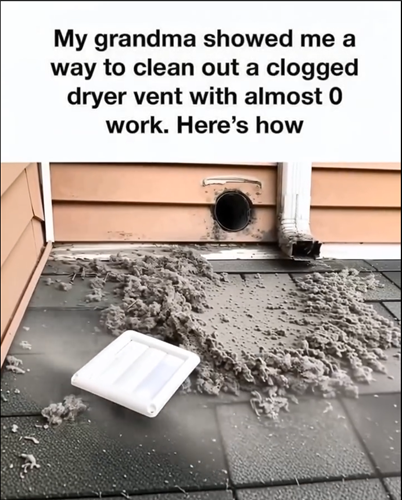
When my grandmother first taught me how to clean a clogged dryer vent, I admit I was skeptical. Growing up, I had always assumed that home maintenance required specialized services, expensive tools, or professional technicians who knew what they were doing.
The thought of tackling something as potentially hazardous as a dryer vent on my own seemed risky and overwhelming. But Grandma insisted it didn’t have to be complicated.
She claimed that all I really needed were a few basic tools, patience, and careful attention to detail. Her toolkit was modest: a simple vacuum cleaner, a long, flexible brush specifically designed for dryer vents, and an old leaf blower she had kept in the garage for decades.
When I looked at her with a mixture of doubt and curiosity, she smiled, calm and confident, and said, “This keeps your dryer running right, keeps your house safe, and costs next to nothing.” At the time, I thought she was exaggerating. I soon realized she wasn’t.

What most people don’t realize is that a clogged dryer vent is not merely an inconvenience; it is a serious fire hazard. According to the U.S. Fire Administration, clothes dryers are responsible for nearly 2,900 house fires each year, resulting in hundreds of injuries and dozens of deaths.
The leading cause in nearly all of these cases? Failure to clean the dryer vent. Lint, which may seem harmless when it collects quietly in the vent, is highly flammable. When it accumulates over time, it can ignite due to the heat generated by the dryer. These fires are particularly insidious because they often smolder behind walls, in ceilings, or in attics, going unnoticed until flames erupt.
Beyond the risk of fire, a clogged dryer vent reduces the appliance’s efficiency, increases energy consumption, and shortens the lifespan of the dryer itself. It can also create a subtle, persistent burning odor, which many homeowners mistakenly attribute to overheated clothing or detergent. My grandmother had experienced a small fire decades earlier in a neighbor’s home — a frightening event that reinforced her commitment to regular vent maintenance. She never wanted another family member to face that danger.
When Grandma emphasized that cleaning the dryer vent was a “must-do,” I began paying closer attention. Over the years, I have come to appreciate just how simple, safe, and effective her method is — and how much time and money it can save, not to mention the peace of mind it provides. Her approach is methodical and deliberate, focusing not just on the visible lint trap inside the dryer, but on the entire vent system — from the back of the dryer all the way to the exterior vent outlet. It’s a level of thoroughness that most homeowners overlook, but it is exactly what makes the process so effective and safe.
Before we dive into the step-by-step instructions, it’s important to understand why this process is necessary and why it works. Modern dryers are powerful appliances designed to remove moisture quickly and efficiently. They rely on a constant flow of air to heat, circulate, and exhaust moisture from clothing. When vents become clogged with lint and dust, airflow is restricted.
The dryer must work harder, running longer and hotter to achieve the same results. Over time, this extra strain can wear down the heating element, motor, and other internal components, leading to expensive repairs or replacement. But the most immediate concern is safety: lint can ignite and create a devastating fire within minutes. According to the National Fire Protection Association, failure to clean dryer vents is the leading cause of dryer-related fires, far outpacing mechanical malfunctions or electrical failures.
Grandma’s method addresses the problem comprehensively, attacking the lint buildup from multiple angles: mechanical agitation, suction, and airflow restoration. Each step is designed to maximize the removal of debris without damaging the dryer or ducting. It also incorporates small but crucial safety precautions that many homeowners overlook.
Step 1: Safety Comes First
The first and most important lesson Grandma taught me is that safety must always come before anything else. Before touching the dryer vent, you should unplug the dryer from its electrical outlet. For those with gas-powered dryers, it’s equally important to turn off the gas valve. This simple precaution prevents accidental sparks, electric shocks, or gas leaks — any of which could cause serious injury or property damage.

Next, gently pull the dryer away from the wall. You don’t need to move it across the room, just enough to access the vent in the back. Many homeowners make the mistake of forcing the dryer around or shifting it roughly, which can damage the vent or the wall connection. Grandma’s philosophy was always “slow and steady keeps you safe.” Even creating a small gap makes it significantly easier to work, reducing the risk of accidents while giving you full access to the vent and surrounding floor area.
At this stage, it’s also wise to check the general condition of the vent hose. Many older homes use flexible foil or plastic vents, which can degrade over time or develop small tears. If the vent is damaged, it’s better to replace it before proceeding with cleaning. Using a damaged vent can compromise efficiency and safety, allowing lint and moisture to escape into hidden areas of the home, creating potential fire hazards or mold problems.
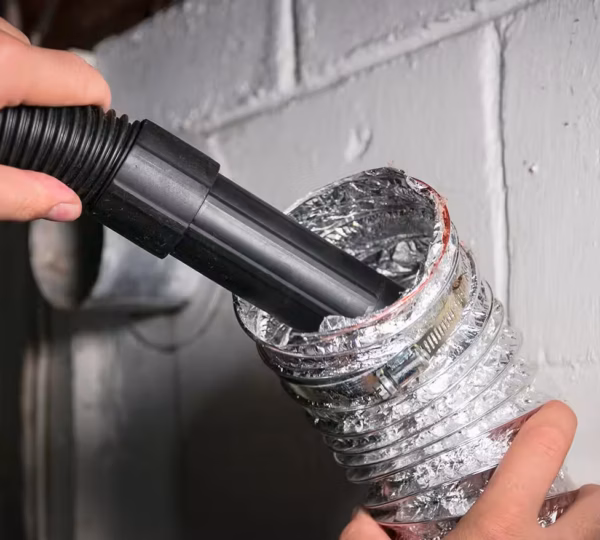
Once the dryer is safely disconnected and moved, the next step is to vacuum the vent opening. Using a vacuum with a hose attachment, remove all visible lint, dust, and debris from the back of the dryer and the surrounding floor. You might be surprised at how much material collects in the small space between the dryer and the wall, even if you regularly clean the lint trap inside the dryer drum.
Grandma shared countless stories about neighbors who ignored this initial step. In some cases, lint had ignited behind the dryer, smoldering unnoticed until it became a serious fire hazard. Using the vacuum first prevents dust from scattering into the room and ensures you have a clear view for the more detailed cleaning steps. This initial suction also helps loosen larger clumps of lint that may be stuck near the vent opening, making subsequent steps more effective.
After the initial vacuuming, the next phase of Grandma’s method focuses on removing lint that is deeply embedded within the dryer vent. This step requires patience, care, and the right tools — but it is also where the process truly proves its effectiveness.
Step 3: The Flexible Vent Brush — Reaching Where the Eye Can’t
A flexible dryer vent brush is one of the most valuable tools in maintaining dryer safety. These brushes are designed to navigate the bends and curves of a vent duct, reaching deep into the system where lint accumulates out of sight. Grandma’s brush extended over six feet and had a handle sturdy enough to provide control without damaging the vent, yet flexible enough to twist through corners.
The process is simple in concept but requires deliberate action:
- Feed the brush slowly into the vent. Avoid forcing it, as aggressive movement can puncture or tear the vent, which not only reduces dryer efficiency but can create hidden safety hazards.
- Twist gently while pushing. The spiral motion dislodges lint clinging to the vent walls. This is especially important in long or curved ducts where static airflow allows lint to accumulate over years.
- Work in small increments. Move the brush a few inches, then pull it back slightly before continuing deeper. This prevents compacting the lint further down the vent — a common mistake many homeowners make when they try to push debris through without twisting or checking.
- Check for resistance. If the brush meets significant resistance, it usually indicates a large clog. Pause, pull the brush back, and vacuum any loosened material before proceeding.
Grandma always reminded me that patience is essential here. “The vent doesn’t get clean because you’re in a hurry,” she would say. “It gets clean because you respect the work it takes.” This careful, methodical approach ensures that nearly all lint buildup is loosened, even from the deepest sections of the vent system.
Step 4: Vacuuming Again — The Key to a Thorough Clean
Once the brush has worked its way through the vent, the next step is to vacuum again. This might seem redundant, but it’s critical for a few reasons:
- Removes loosened debris: Brushing dislodges the lint, but suction is needed to pull it out completely. Without this step, lint can fall back into the vent or create blockages near the opening.
- Reduces fire risk: Any remaining lint is a potential ignition source. Vacuuming immediately after brushing ensures that the vent is clear, minimizing the likelihood of overheating.
- Prepares for airflow restoration: A vacuumed vent allows air to move freely during the final clearing step with a leaf blower.
Use a vacuum with a narrow attachment for precision. Move slowly around the vent opening, ensuring you pick up every clump. Some homeowners also use a small hand vacuum or a shop vac, which can handle fine lint particles more effectively than standard home vacuums.
Step 5: Blowing Out the Vent from the Outside — The Final Push
Here’s where Grandma’s ingenuity shines. The final step involves restoring full airflow by expelling any residual lint and dust through the vent’s exterior opening.
- Locate the exterior vent: Usually, the vent is on an exterior wall or roof. Most vents are protected with a simple cover or flap held by screws. Carefully remove the cover, keeping an eye out for insects, birds, or small animals that may have nested inside.
- Insert a leaf blower: A leaf blower is ideal because it provides powerful, controlled bursts of air. Grandma had one she had designated solely for this task. Insert the nozzle into the vent and give it short, forceful bursts. This dislodges and expels any remaining debris far beyond what brushing or vacuuming can reach.
- Check airflow: As lint and dust shoot out, you’ll notice immediate results. Air flows freely, and the vent is essentially restored to a near-original state. The process may be repeated if debris continues to emerge.
This step is particularly effective because it addresses the entire duct system, including the sections farthest from the dryer. Many people clean only the lint trap or the initial portion of the vent, leaving the majority of the ductwork clogged. By working from the outside, Grandma’s method ensures that airflow is maximized throughout, which directly improves dryer efficiency and reduces heat buildup — a major contributor to fire risk.
Step 6: Reassemble and Test — Confirming the Work
Once the vent is completely cleared, it’s time to reassemble everything:
- Replace the exterior vent cover securely to prevent pests or debris from entering.
- Reconnect the dryer and carefully slide it back into place. Avoid pinching the vent hose, as this can reduce airflow and increase fire risk.
- Test the dryer: Run a short cycle with a small load. Pay attention to how the dryer feels and sounds. Grandma taught me to feel the exterior — if the dryer feels cooler and operates more quietly, the vent is clear. Clothes should dry faster and more evenly, and any lingering burnt lint odors will dissipate.
This step is more than a routine check. It reinforces the importance of attentive maintenance, confirming that the effort invested has produced tangible results. A properly cleaned vent allows the dryer to operate safely and efficiently, reducing energy bills, wear and tear on the appliance, and — most importantly — the risk of a preventable house fire.

Why This Multi-Step Method Works
Grandma’s approach works because it combines several techniques to address the problem comprehensively:
- Mechanical agitation (the flexible brush) dislodges stubborn lint clinging to duct walls.
- Vacuuming removes loosened particles, preventing them from falling back into the vent.
- Airflow restoration (the leaf blower) expels debris from the entire system, ensuring full efficiency.
Each step complements the others, creating a thorough, effective process. By contrast, cleaning only the lint trap or superficially vacuuming behind the dryer is insufficient. Such partial maintenance leaves hundreds of feet of ductwork filled with dangerous, flammable lint.
Beyond Safety: Efficiency and Cost Savings
A clean dryer vent is not only safer but also more efficient. When airflow is unrestricted:
- Drying times are shorter, which reduces electricity usage and energy bills.
- Appliance lifespan increases, as the dryer does not overheat or work harder than necessary.
- Clothes smell fresher, as residual lint and dust that can trap odors are removed.
From a practical standpoint, this method is inexpensive. A quality vent brush costs under $20, and a leaf blower is often a common household tool. Compared to hiring a professional service, which can cost hundreds of dollars, Grandma’s method is simple, cost-effective, and repeatable.
For me, learning this method from Grandma was about more than preventing fires. It became a lesson in patience, attentiveness, and stewardship. She approached home maintenance with a quiet reverence, demonstrating that small, consistent actions prevent major problems. Every spring and fall, she insisted on performing this ritual together. There was a rhythm to the process, almost meditative in nature: slowly twisting the vent brush, carefully vacuuming up debris, and finally watching the leaf blower expel years of accumulated lint into the open air.
These moments were teaching opportunities. Grandma didn’t merely tell me that cleaning vents was important — she showed me why, step by step, and explained the potential consequences of negligence. Through her guidance, I learned how seemingly minor tasks can have far-reaching effects. A clogged dryer vent, if ignored, can cause:
- House fires, due to the ignition of accumulated lint.
- Higher energy consumption, because the dryer must work harder to push air through a restricted vent.
- Appliance damage, as prolonged overheating wears down the motor, heating elements, and other components.
- Lingering odors, caused by trapped lint that slowly burns over time or mixes with moisture.
By cleaning the vent thoroughly and regularly, all of these risks are mitigated. What seemed like a simple chore became a meaningful act of care for family, property, and peace of mind.
Establishing a Routine — When and How Often to Clean
One of Grandma’s core principles was consistency. She recommended cleaning the dryer vent at least twice a year, ideally during spring and fall, coinciding with seasonal home maintenance routines. Homes in high-humidity areas or with heavy laundry use may benefit from quarterly inspections, especially if multiple loads are run daily.
To maintain a clean vent throughout the year, consider the following preventive strategies:
- Empty the lint trap after every load. While simple, this reduces the volume of lint entering the vent.
- Inspect the vent hose periodically. Look for creases, tears, or crushed areas that restrict airflow. Replace flexible hoses every few years or upgrade to rigid metal ducts for better safety and airflow.
- Ensure proper vent termination outside. The exterior vent should allow free airflow and have a protective flap or screen to prevent animals or debris from entering. Blocked or poorly maintained exterior vents can negate even the best cleaning efforts.
- Monitor drying times and dryer temperature. A noticeable increase in drying duration or a hotter-than-usual dryer can indicate a partial blockage or reduced airflow.
By integrating these simple habits, you prevent minor issues from becoming major problems. Grandma always emphasized that prevention is far easier, safer, and more cost-effective than repairing damage after it occurs.
Teaching Others — The Ripple Effect of Knowledge
Another lesson I inherited from Grandma was the importance of sharing knowledge. I began passing this method on to friends, neighbors, and eventually my own children. It is remarkable how quickly people underestimate the importance of dryer vent maintenance until a story or statistic hits close to home. Demonstrating the method step by step — the vacuuming, brushing, and air-blasting — makes it accessible and encourages others to take responsibility for their home safety.
Over time, I realized that the act of teaching became a continuation of the ritual itself. Each time someone learns the method, the risk of preventable house fires decreases, the efficiency of dryers improves, and the lifespan of appliances extends. What began as a practical household lesson grew into a small but meaningful way to protect the well-being of others.
Long-Term Benefits — Safety, Efficiency, and Cost Savings
The cumulative impact of this routine is remarkable:
- Enhanced Safety: Regular cleaning drastically reduces the risk of fire. According to the U.S. Fire Administration, removing lint from vents is the single most effective way to prevent dryer-related fires.
- Improved Efficiency: Clean vents allow hot air to circulate freely, reducing drying times and energy usage. This can lower electricity bills by 10–30%, depending on dryer use and vent condition.
- Extended Appliance Lifespan: Overheating and overwork shorten the life of the heating element, drum motor, and sensors. A well-maintained vent keeps the dryer functioning optimally for years.
- Better Laundry Results: Clothes dry more evenly and quickly, and the subtle odor of accumulated lint disappears, leaving fabrics fresher.
Financially, the benefits are significant. The cost of a vent brush is modest — often under $20 — and most households already own a leaf blower or can acquire one inexpensively. Compared with service calls from professional technicians, which can range from $100 to $300 per visit, the method is overwhelmingly cost-effective.
Beyond Mechanics — The Ritual of Care
Grandma’s wisdom also underscored a broader life lesson: the value of intentional, hands-on work. In an age dominated by convenience and instant solutions, it is easy to delegate household tasks to professionals or ignore them altogether. Yet, there is power and satisfaction in performing tasks thoughtfully, understanding the risks involved, and taking proactive steps to prevent problems.
Every time I complete the vent cleaning ritual, I feel a quiet sense of accomplishment. I know my home is safer, my appliances are functioning efficiently, and I am actively caring for my family. There is also a subtle mindfulness to the process — a reminder that diligence and attention to detail in small, routine actions can prevent disasters and improve quality of life.
Final Thoughts — A Lasting Legacy
Learning this method from Grandma taught me more than how to maintain a dryer vent — it taught me responsibility, patience, and foresight. A clogged dryer vent may seem like a minor inconvenience, but the consequences of neglect can be severe, ranging from increased energy costs to devastating house fires.
Her method — vacuuming, brushing, and expelling debris with airflow — is simple, practical, and highly effective, proving that hands-on care often surpasses expensive gadgets or professional interventions.
Whether you are a new homeowner, a parent passing knowledge to children, or someone looking to maintain your home efficiently and safely, this method offers enormous payoff. Beyond technical results, it embodies the lessons of generational wisdom: diligence, resourcefulness, and a commitment to family safety.
Grandma’s words continue to resonate with me:
“This keeps your dryer running right, keeps your house safe, and costs next to nothing.”
Her approach is timeless. It is a rare example of practical advice that is simultaneously protective, cost-effective, and empowering. By dedicating just a small amount of time twice a year, anyone can prevent dangerous buildups, reduce energy consumption, and ensure their home and family remain safe.
In the end, cleaning a dryer vent is more than maintenance — it is a legacy of care, responsibility, and mindfulness. And as I now pass this ritual along to others, I honor the lessons of my grandmother while keeping the safety, efficiency, and comfort of my home at the forefront.